Posted on Leave a comment

Mrs. Maisel – “We got the Rabbi” Pink Coat: part 1

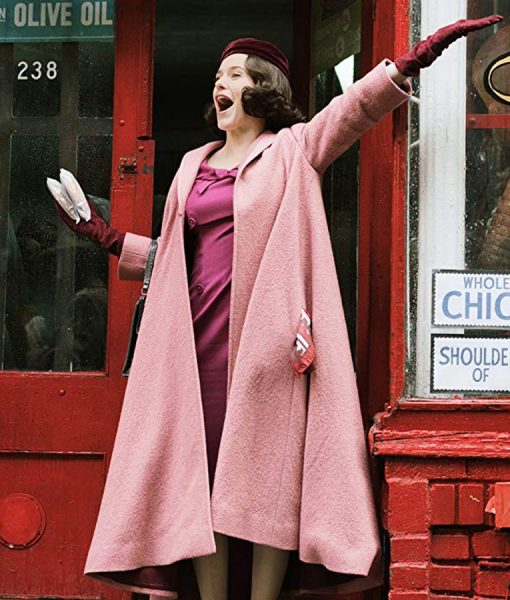
As I stated in my introduction to the Gingham suit project, which somewhat ironical will get finished after this project, every fan of Amazon’s The Marvelous Mrs. Maisel has their favorite outfit or two from each of the three seasons. Most get added to the bucket list, some get made as close to screen accurate as possible, and some become inspirations for a variation on the theme, but everyone has a favorite. Mine is the black and white gingham shorts suit. My second favorite is her iconic pink wool swing coat.

What’s not to love about a flowing winter coat that comes down past your knees that just happens to be your favorite color, right? Let’s review the coat and the pattern from which it’s going to be recreated.

I am extremely grateful that the Simplicity Pattern Company has chosen to revive some of their vintage patterns. It makes it easier to make something with a solid base to start from than having to cobble two or three patterns together to come with something. Simplicity’s 8509 “Misses Vintage Lined Coat…” fits the bill to a tee. It even has an option to add pockets, which I’m going to do because a girl needs her pockets. Where else are you going to tuck your silk scarf and gloves? [Yes, yes, I realize that Midge would have put her gloves in her handbag, but I enough stuff in my bag already and the coat pocket is the only place that I can put my gloves and have them when and where I need them.]

So what are the challenges that I am facing with this project?

  • Grading the pattern up four sizes. Unfortunately, I am overweight, very overweight, and most store-bought patterns are not large enough for me.
  • Making a toile or muslin. I hate, hate, hate spending the time having to make a fitting garment to prove that my rusty grading skills are still on the money.
  • Limited fabric and no place for muck-ups. I got my beautiful and luxurious cashmere and wool blend soft rosy pink coating on sale for 70 percent off, once it’s cut, it’s cut and there won’t be anymore. It’s not that I couldn’t find a comparable fabric, but this particular fabric has been sold out. Thus, my need to make a muslin…
  • Bound buttonholes. I tried to make these years, no decades ago, and worse on bonded polyester double knit, which the masses now know as “scuba knit.” I was a disaster and the vest that I was making out of scarps from a jumper that my mom made never saw the light of day.
  • Keeping my swearing down to a minimum. I bought polyester bridal satin for the lining. This stuff unravels as you work with it and I forgot to buy a bottle of Fray Check. As a side note, I chose to not line the coat with the same raspberry colored lining as the original one from the show as I wanted something that would go with more than pink would. Also, it was the only thing that Joann’s had that even came close to the same color family as the main fabric color albeit it about three or four shades lighter.

Next post: Making the muslin fitting.
Posted on Leave a comment

The Infamous 1920s “One-Hour” Dress – Is it really possible?

We’ve all seen the references to a mid-1920s dress that can be made in an hour and find ourselves intrigued by the possibilities.

If you are like me, you discovered the “Miss Fisher Mysteries” on Netflix and have become enamored with this non-formula detective drama with a strong female lead.  Not only does the show feature the brilliant, smexy as all get-up, burgeoning middle-aged Miss Phyrine Fisher and a delightful group of supporting cast, but some very wearable 1920s clothes.

So now inspired by yet another television drama with fabulous clothes, the siren song of lady google-lay beckons us to comb the web for resources so we can create our own copies of her period-appropriate “Capsule Wardrobe.” [At some point in time, I’ll blog on my love-hate relationship with capsule wardrobes.]

So… sometime back in March, I had a Tea coming up. It was at one of my favorite places, which is housed in a building that was built in 1926.  And rather than wear my sad Titanic era dress and the abomination that is the hat, I decided that I would accept the challenge and attempt to make the infamous “One-House” dress and see if it can actually be done in an hour.

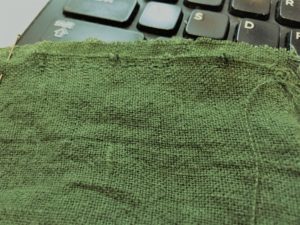
I raided my stash and came across some fabric that reminded me of Miss Fisher’s companion, Dorothy (“Dot”) Williams.  It’s been washed and ironed. I acquired a pattern, printed it, and read through it, measurements were taken.  And as soon as I can get to my sewing room the clock will start ticking.

This is going to be fun!

… to be continued …

Posted on 1 Comment

ADBP – Basic Under-Petticoat Review

When you start a new project, you always want to start with a review of the foundational pieces: corset, petticoats, and chemises, and then you ask yourself the following questions:

  • What do I need?
  • Do I have something from a different era that will suffice or are the shaped so radically different that I need to make a standalone piece?
  • Do I really, really need to make another [fill in the blank].

In this particular case, since I’m going to be working my way through the entire book, the answer is in the form of a question, “What is the first project?”  In this case, it’s easy-peasy: it’s the first project in the book: “Basic Under-Petticoat.”

Step 1: Find myself some heavy linen.

I have some 7 oz. Spruce green, heavy-weight linen. I’ve been planning on making some Outlander cosplay entirely out of linen, and this seems like a good place to start.  I have bleached linen, but it’s only 5.3 oz. Linen and thus, not heavy enough for this project.

Step 2: Measure from my natural waist to lower calf.

I got 33 inches.

Step 3: Cut two pieces 33 inches long by the width of the fabric.

Check; trim fabric width down to 50 inches from 60 inches, for a finished skirt width of about 98 inches, check.

Step 4: Sew. By. Hand. [hashtag #HandsewingInsanityProject ]

I’m using the mantua maker’s seam on the raw edges of one of the side seams and the other I’ve used the selvage.

Step 5: err …take pictures while sewing

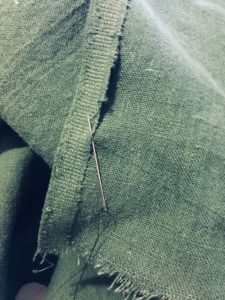
Initial stitching -- my hand sewing skills are a bit rusty.
Initial stitching — my hand sewing skills are a bit rusty.

I’ve played a little bit with the color temperature of my iPhone photo in a vain attempt in try and get something closer to the actual fabric.  Alas, it’s a fail.  And yes, since this is an exercise in using what I’ve got on hand, the thread is a bit too green for the fabric.

You’ve probably noticed that the edges of the fabric are offset.  This was purposefully done.  I used the mantua maker’s seam to finish the cut edge side seam.  The seam finish is very similar to a traditional flat feld seam.  The book explains it better than I can.  I will add that requires a lot of pins to neatly hold the fabric in place while you’re sewing.  I like the look of the finished seam as it is very small and very flat.  I plan on using it for my chemises and smocks moving forward as it should make the armscye gussets less bulky and thus, much more comfortable.

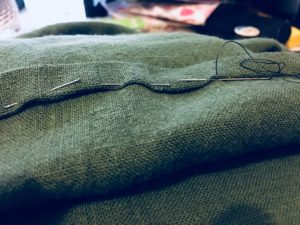
Tacking down the selvage to form the side opening. My stitching is looking a bit better
Tacking down the selvage to form the side opening. My stitching is looking a bit better.


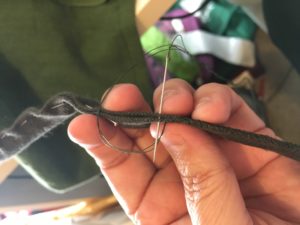
I switched to a black silk thread on my other side seam.  It’s a little easier to use a single strand, and not doubled. I tried doubled thread, but it kept twisting up on itself and annoying me.

Photo Dec 08, 2 44 44 PMStitching the double-turned 1/2 inch-ish hem.  I eyeballed it and then pinned it to death, stabbing myself a few times in the process.

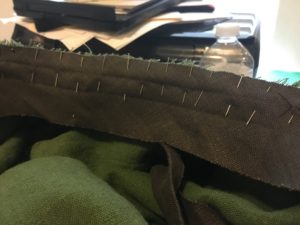
Adding bias tape to serve as the waistband

Adding bias tape to serve as the waistband with lots and lots of straight pins to hold it and the pleats underneath in place.

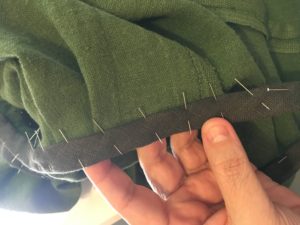
The book calls for 3/4 to 1 ” wide linen or cotton tape for the waistband.  As I did not have any, only some 1/2 ” wide twill tape left over from my last Trunk Club, and I already had other plans for it, so I used the linen bias tape I made for the 18th-century cloak class I took at Costume College 2016.  [It’s the same fabric that I’m going to be using for my English gown.  This way if the skirts slip, it won’t be quite as noticeable.]

Finishing the waistband, and using lots and lots of pins to keep the fabric in place while stitching.


Whip stitching the ties closed with a zillion little stitches.
Whipstitching the ties closed with a zillion little stitches.

Step 6: Model finished project.

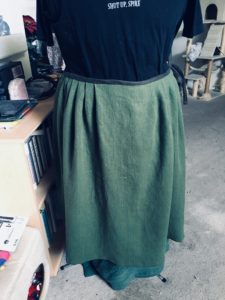
Petticoat is modeled by "the chick".
Petticoat as modeled by “the chick.”


As I totally stuck at selfies of any kind and my husband was out running errands to prepare of a business trip, I popped my new finished onto my dress form that we nicknamed “the chick” many moons ago.  It’s currently padded out to fit my BFF, so it’s smaller than my measurements, hence the droopy waistband.  That extra green fabric that hanging below is a cotton blanket that is being used to pad the chick out and impatient me didn’t bother to pin up out of the way.


Step 7: Conclusion and nitpicks.

Somewhere in my bio, I believe that it states that my mother taught me how to sew as an attempt to teach me patience, and probably what the results of perseverance will bring forth when you chose to apply yourself. When it comes to sewing, I am a speedy girl. It’s one of the reasons why I own a 1/2 horse-power industrial straight machine. I just want to “getter done.” What I am going to suggest to everyone, regardless of the years of sewing under their belt, is slow down and take the time to read the instructions before launching off into the deep end.  I completely glazed over the instructions for cutting the fabric and it wasn’t making any sense until I went back and reread the cutting instructions.

All and all, this is a very easy and straightforward project.  The instructions are well written, and for the visual group, the photos are worth a thousand words.  Once you’ve mastered this project, you’re ready to tackle the next project: the English Gown Petticoat.

Posted on Leave a comment

Embracing the insanity that is hand-sewing: The American Duchess Book Project

There are days when I question my sanity, and then I remember that I’m running a fever and everything makes sense.  I started coming down with a cold when I made this earth-shattering decision: I decided that I was going to make everything in the newly published “The American Duchess Guide to 18th Century Dressmaking” book.  Some of it will be done all by hand, some it will be mostly done by machine and other concessions along the way, but all of it will be for me.

The book is nicely presented with color photos and illustrations.  The text is easily understood.  My only initial complaint is the book does not contain shifts, chemises (if you’re French), or stays (corsets).  I’ve watched the YouTube videos and heard about the time constraints and that some things had to be cut, and would be covered elsewhere like the AD blog, but how about a book on underpinnings, and just underpinnings?

For the purpose of continuity and ease for searching, the blog posts, this series is going to be referred to as ADBP with the project name. I’ll be using the Twitter hashtag #HandsewingInsanityProject

Wish me luck.

Posted on Leave a comment

What we’ve been up too — 7/21/2016 edition

Besides tending to the needs of our gracious feline overlords, where is a little of what we’ve been up to lately:

  1. Game of Throne cosplay — We created our version of the High Sparrow’s robe.  Blog post in progress in this one.  Did you know that he had four different ones if you count the one he wore in the Season 6 finale?
  2. Went on “progress” to have lunch with Claire and Jamie — I went to the Outlander exhibit at the Paley Center.  I have two words: ‘awesome’ and ‘go’.  Seriously, if you live within a couple of hours and are a fan of the show and the incredible work that Terry Dresbach and her extremely talent team create it, it is worth the trip to Beverly Hills to see it.  [Me: Does sipping a frappucino in front of the window drooling at the RED dress count as lunch?]
  3. Fabrication:  We’ve received our first batches of Tudor era style wool from England.  We’ve received some heavy weight “poor black” linen as well.
  4. Costume College 2016 — Yep, we’re going.
Posted on 9 Comments

My 2 cents on Showtime’s “The Tudors”

WARNING: The following contains a RANT. I hereby tender my apologies to all the might be otherwise offended.

Furthermore, this has been copied over from my other blog from 2008, and while updated because the show’s costuming department cleaned us their act and as each season got better, I still have issues, but it still bears repeating in a more appropriate arena.

I just finished watching “The Tudors” on Video on Demand. In addition to really wishing that the love of my life knew more about 16th century history, I spent even more time constraining myself from yelling back at the telly about the very pretty to look at, but oh so horribly wrong costuming […like the TV could do anything about it.] Dudes, you do not spend half of your adult life getting paid by people to research and make and oh yes, beta testing patterns for Reconstructing History and not end up without learning a thing or two about Tudor and Elizabethan clothing.

I ask the somewhat rhetorical question:

How it is possible that with the plethora of readily available resources of books, innumerable portraits and bona fide professional Tudor and Elizabethan costumers who have meticulously produced patterns from extant garments which they sell on the freakin’ Internet no less (Ninya Mikhaila and Jane Malcolm-Davies, authors of The Tudor Tailor and renowned English Tudor era costumers and Kass McGann of Reconstructing History in the United States), that so many things could be so horribly wrong? The answer lies within the costumer’s very own words: it was deliberate.

To the costumer on this show, I commend you for your efforts of having to coordinate such a volume of work, but it stops there.

I watched your interview on Showtime’s website. I fully understand your desire and felt need to make the clothing accessible to the modern viewer. I really do. I did Renaissance Faire costumes for performers for nearly 25 years and yes, certain concessions were made to help convey a sense of class structure to help the average Faire goer distinguish between peasant, middle class and nobility. And yes, other concessions were and are still being made because of the climatic differences between 16th century England and 21st century United States, specifically southern California.

However, because so many of us have grown up on our local Faires, and have seen the multiple Oscar winning “Shakespeare in Love” innumerable times, and have seen both “Elizabeth” movies (both not without their faults, but still brilliantly done), and will be seeing “The Other Bolyen Girl” shortly as well as numerous other 16th period pieces: this era of clothing is not new to us. Early Tudor attire might seem a bit odd with its strange sleeves and ladies’ hats that look more like bird houses than hats, but still….

Yes, I agree that the King and his nobles were the equivalent of rock stars in their day and that their clothing would and should reflect that. No argument there. What I take issue with is:

    1. Mixing eras: The theory is that this drama is set in the 1520’s and perhaps even as late as1530. However, I saw clothing that was decidedly Elizabethan in design rather than Tudor. A 1580’s doublet is not quite the same as the gown men were wearing in the 1520’s. The character of Sir Thomas Bolyen was dressed far more appropriate for the period. Contemporary portraits of Henry VIII prove that. These two examples 1520, two years prior to Anne’s arrival at Court and http://tudorhistory.org/henry8/younghenry.jpg and 1526, when it is purported that Henry first took notice of her http://tudorhistory.org/henry8/henrymin.jpg. Another example is a somewhat famous portrait for 1536, the year Anne was beheaded. http://tudorhistory.org/henry8/holbeincopy.jpg.
      (As a side note, it should be noted that Henry was 45 years old at the time. Anne was a mere 27 …34, depending on your sources. So the actor playing Henry is a bit too young and besides, the actor cast as Buckingham would have been a much better cast both in physical appearance and “presence” — I’m agreeing with my Pastor on this one — gotta sex it up for the ignorant masses …grumble, grumble.)
    2. Hair: Men’s hair was too short and the women’s hair was down. Find me a source or non-allegorical portrait to prove otherwise. The wearing on women’s hair down is a 20th century development. Something about it being a sin for a women to show her hair in public.
    3. Hats: Where were they? Not nearly enough hats. Everybody wore some type of head covering at almost all the time. Anybody aware of the fact that Henry passed a law that everyone in the realm must a wool hat on Sunday or be fined or imprisoned? Something about it being a sin to have your head uncovered for anyone but the Lord?And what’s up with the flocked fishnet veiling Anne was wearing?And for that matter … where were the French Hoods that she brought to England from the French Court that it’s said that she wore nothing else. Please do not tell me that those tiaras-thingies that the actress wore are French hoods.
    4. Sleeves: Again, where were they? No one would have been seen sleeveless. Again, exposed bare flesh was right out. Not a single one of those funky false hanging fold-back sleeve to be seen.
    5. Chemises: Again, where were they? (Yes, yes, I’m sounding like a broken record.) We’re talking about a time period that didn’t bathe regularly and when they did, they did it in their all-purpose undergarment know as a chemise. Again, exposed bare flesh, yadda, yadda, yadda.
    6. Necklines: Way too much cleavage being flashed about. Clear examination of portraits prove that. The best way to simply describe Tudor era necklines is to locate your armpit, and then connect the dots as it were between the armpits across the chest and you’ve got a proper neckline.
    7. A visible zipper placket: self-explanatory.
    8. Recycled costumes: I’m down with the idea of saving time and money and taking advantage of Western Costumes when you can. But if you’re going to rent costumes, could you make sure that they weren’t worn by Gwyneth Patrow in Shakespeare in Love? (The orange velvet picadilled jacket and tapestry skirt when she met with Wesicks and slapped him for kissing her and the pale green surcoate / dressing gown that she wore throughout the movie.)

Here’s the thing, the key to good period costuming is to recognize that whatever we do that it is an interpretation of historic design – a sentiment that I used as my business’ tagline for many, many years. We can never fully reproduce clothing in the manner that they did then and make it cost effective for any sort of production. Personal costumes where we have the luxury of hand-sewing is another story. The fact of the matter is there are weaving and construction techniques and fabrics that have been lost to us five centuries later. What we can do is be a faithful as possible to dutifully convey the details of the period as accurately as possible. There are times where we must substitute fabrics because the period fabric has been lost in time or is completely cost prohibited. Been there, done that … However, as I progressed in my craft I learned what and when to substitute and how to do it convincingly.

Perhaps more importantly, we should never “dumb-down” our work and make concessions to audience to the point where we suddenly become Doc Brown dressing Marty McFly in 1950’s western wear (from Nudie’s Rodeo Tailor, no less) to go back to 1885 and expecting him to seamlessly blend in. It never works and I believe we lose a certain amount of integrity in doing so.

And to answer to unasked question: YES, yours truly is available for hire as a consultant or outside contractor. Travel on Sundays is always out of the question.