Intro: The Tudor Tailor’s Patterns for Tudor kirtles and petticoats
I am still in the midst of writing my historical romance novel and have hit that crossroads where I have run out of original Renn Faire character story arc and the proverbial wall. So I decided, “Hey why not make yourself a costume and go to some local faire and be your female protagonist again and see where she takes go.”
So I’m going the Nottingham Festival …. in a month …from yesterday. It’s the last local faire until the spring and will tie in nicely with the timing of #NaNoWriMo which starts on 11/1. No pressure. Since time was of the essence, rather than draft my own patterns because I have to start from the ground up, I chose to go with The Tudor Tailor’s Tudor kirtles and petticoats pattern. I bought the pattern a couple of years ago and it’s been sitting around calling to me.
The fabric of choose is asphalt grey 5.3 ounce linen that I also acquired two years ago. The sleeves may or may not be made in either willow or natural linen, it depends on our capricious weather.
It is finished, at least the knitting part. I still need to weave the ends in and add more tassels — the Whovian Times pattern that I used calls for seven tassels and I think that must have been wrong and every scene I’ve seen while streaming classic Doctor Who via Netflix has much more.
I know I either heard or read that somewhere, just can’t remember exactly where so I”ll give the Doctor himself the credit and move on from there.
Being a child of the sixties and seventies, my first Doctor was number 4, although retrospectively speaking it could have actually been 3 because it was my father who introduced me to Doctor Who [pun not intended, exactly], but it was Tm Baker that won my heart and like all fans I had to have the scarf. That was also 30 years ago.
2013 has sorta of become my bucket list year, not that I’m dying or anything like that, just finally getting around to doing things that have been sitting around too long — the first being the (almost fully finished) Eleanora of Toledo Gown; the second being my beloved fourth Doctor’s scarf.
I started the scarf on May 18th as sort of an early birthday present and I’ve being tweeting my progress on the scarf via one of my twitter alter egos, which I’ve recapped below and have gotten a couple of replies. One was a woo-who, very excited and the other was “I’ll never do that again.” Surprisingly, when I did a search on the #DoctorWhoScarf hash tag on Twitter, that was the majority opinion: never again.
Perhaps I’m in the minority, the extreme minority, but I’ll only been at this 6 weeks and I’m over half way there as testified to my my scraf-o-matic ticker below. [Come on people, it’s only a simple garter stitch! You can do it! she says in a bad impression of Matt Smith as 11.]
My Doctor Who Scarf status ticker – 6-29-2013
I am delighted that I’m finally knitting this and that is going so very quickly and yes, I am available for hire to knit one of your very own, I’m just trying to figure what it’s going to cost. (Reply to this post if you’re seriously interested and I will get back to you.)
For those who’ve just gotta know, I’m using the “Official BBC Enterprises Knitting pattern for the ‘Doctor Who’ Scarf,” which can be found here: http://www.androgums.org/scarf.html. I am using a combination of acrylic yarns that best matched the colors with a slight deviation from the original — I’m using an oatmeal color instead to the camel to go better with my skin tones …after all, it is my scarf.
I’ve used the color resources at Doctor Who Scarf .com to help pick my color palette. I opted for the more natural colors. http://www.doctorwhoscarf.com/s12.html
Twitter feed recap:
5/29/13 — #DoctorWho scarf status report week 1.5 I’ve gotten about 27 inches done.
5/30/13 — This witty knitter is using a blend of acrylic yarn and cat fur so it won’t be too itchy #DoctorWho
To quickly recap what’s been happening over the past couple of weeks, although in reality, it’s only been three, or four days of limited hours of sewing…
Corset: We have achieved corset, but not without making the first one two sizes too small, which I supposed had much to do with the fact that I took two people’s measurements at the office at the same time and had the petite-er of my two petite co-workers in my head at the same time. My corset pattern is The Mantua Maker’s 1550-1630 “Quilted Pair of Bodies — the same pattern I used for my own a few years ago. The pattern is a dream and props to the person who drafted it.
Because my current victim is well-endowed with vast tracks of umm… [insert Monty Python reference here] to make a corset that will fit her frame and accommodate the girls, the straps have to come off as they hit her in the wrong place…for example the back of her arms and generally force the corset up too high on her. Other than trimming the waistline up about a 1/2 inch across the back and sides, things have worked out well.
Camicia: For those not in the know, a camicia is a shift or what is more commonly referred to as a chemise. The fabric of choice is 3.5 oz. linen which comes from my favorite online fabric source, which is surprisingly a local vendor — local meaning the greater Los Angeles area, though the lady for whom I am sewing kept saying, ‘This feels just like the linen I’ve seen in the Ukraine. This is just perfect, I already feel at home in my costume.” [me: Gotta love the neophytes …but she should know as she’s basically from there. *rolling eyes*]
I followed the instructions that came with the pattern for the 1540s-60s Florentine Lady’s Outfit from Reconstructing History.com almost verbatim, the exception being is I made my own bias for the neck band. While this is most likely not 100% period, it does give it a much nicer, smoother, and cleaner look and finish.
People, take the time to learn how to cut and make your own self-bias, it will make all the difference in how professional your finished garments will look, and you’ll feel awesome that you finally did it.
The Gown: It’s under construction and worthy of its own pattern review rant. I will say this n the interim: “Kass, I love you but the slacker girl in me would readily pay an additional $10 for skirt pieces on separate sheets of paper rather than trace them off separate. I just don’t have the time to do it every single time.“
First of all, I want to give props to Simplicity; they’ve really stepped up their game over the past 15-20 years with their period patterns. I’m sure it’s part whining from costumers like myself about inconsistencies and their marketing and R&D people telling the higher-ups about such sites as Reconstructing History and the plethora of period patterns. Or then again, it could be the success of The Tudors, which I have taken the first season to task for their costuming choices here.
The pattern pieces are very, very close to those in Juan De Alcega’s Tailor’s Pattern Book 1589. In fact, it’s close enough for me never to try to draft a farthingale from De Alcega’s book again. I’d really prefer to use my own tried and true, and Renn Faire tested pattern from Janet Arnold’s Patterns of Fashion, but time is of ye ole essence, so I’m making do with what I have readily on hand.
The only changes that I recommend making are:
Make life easier on yourself, and do not sew up both side seams until after you sew on the casing for your hoop wire unto the right side of the fabric, stopping about 2-1/2 inches from edges on both sides. [picture below] After the hoop wire casings are sewn in place, then sew up the remaining seam, remembering to leave an opening as shown on the pattern.
Why do step #1? It is much easier to pull the hoop wire out and re-insert it for washing, and any Rennie worth their weight in, um… well, they know that after a season of Faire farthingales need a good washing and unless you’ve used the plastic-coated hoop wire and have some way to hang the silly thing up, it’s just a lot nicer to be able to throw it into the washer and dryer, I’m just saying. (Also, now that I’ve used it, not a fan of the plastic-coated hoop wire, too flimsy for anything other than lightweight fabric, which this is for.)
Spacing: if you plan to wear a heavy, jewel-encrusted velvet Noble’s gown, you will want to space your rows of hooping closer together. I recommend 4 inches rather than the near 6 as laid out on the pattern. Remember, the more hoop wire, the more stability, and the less likely that your new farthingale will collapse under the weight of your gown.
Cut your hoop wire about 12 inches longer than recommended on the pattern and either use the little metal caps in the cut ends that are sold for this purpose or use the lazy girl’s choice to wrap the edges with a waterproof piece of bandage tape. This will allow enough extra hoop wire for overlap, and the extra gives you something to grab hold of when you are extracting said hoop wire for laundering and repair.
Number your hoop wire. After you’ve cut it, use a Sharpie or other brand of permanent marker (color of your choice), and on the backside, write the row number on it. it will make life so much easier, especially if you are doing this at 3 AM. [Yes, I speak with first-hand knowledge on this, so just trust me.]
Pre-wash both your fabric and twill tape — cotton and linen both are notorious for shrinking more than you would suspect, and nothing is more frustrating than finding out something is now four inches too short (or too small), and there’s nothing that can be done about it.
I suggest using a 3/4 or 1 inch rather than the recommended 1/2 inch wide twill tape on the pattern envelope. Again, nothing worse than having the odds stacked against you before you’ve even started threading the hoop wire through its casing.
Also, good a better quality fabric than the $1.99/yard muslin special. For personal costumes, I have “re-purposed” solid-colored bedsheets when I’ve up-sized our mattresses. A good quality percale top sheet can take the abuse and still give you many years of use as your farthingale base.
Let your farthingale hang overnight or a week if time (and environment) allows before hemming it, putting the last hoop to allow the fabric to stretch itself out naturally. This way, there is no surprise “growth spurts.”
Now, will I use this pattern again? Maybe, maybe not …I haven’t decided yet.
Would I recommend: surprisingly: Yes. It will serve its country well.
Today: Ordered what I hope will be a 20 yard piece of a very nice black and silver-gray jacquard ribbon that has the feel of the original trim work on Eleanora’s gown. Humorously enough it’s from a vendor on Etsy from my next of the woods [go figure.]
Next stop is to order linen from Fabrics-store.com for the lining because the Thai silk is a bit lightweight to stand by itself.
On the sewing front, it’s underpinning day so it’s time for corset making, chemise and with any luck, I’ll find my farthingale pattern… well, actually any farthingale pattern will do, mine, the one I bought from Mantua Maker or heck, even the Simplicity one will do.
Fast forward 9 years . . . Yes, nine years and a brief “retirement” from costuming and I am finally back on track for making this gown, and it’s going to get done in the next month. Instead of being for me, it is part extravagant birthday present and part reciprocity for proofreading a novel I am writing for a friend and co-worker [Yes, I am a victim of NANOWRI disorder.}
Also since so much time has passed, I’ve been able to rethink some things about construction and linings and stuff, and by luck, my friends at Reconstructing History have taken the time and inclination to create a pattern for the EOT gown so now I don’t have to spend hours swearing while drafting patterns from the scale graphs in Patterns of Fashion.
Wish me luck as I’m changing body type gears from a BBW Californian to a very buxom, petite European import.
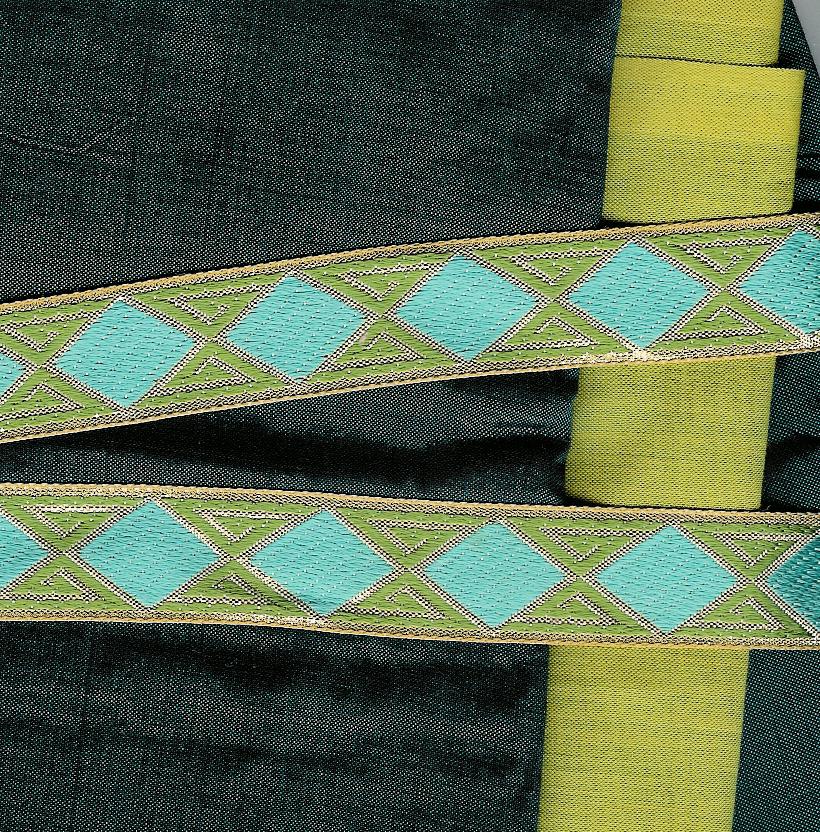
A slight change in plans . . . (cira. 10/17/2004) About a month ago, I went ebaying to see if I could track down more of the original lime silk because I wanted to make sure that I had enough for the sleeves. The merchant had some, their last piece in fact, but the dye lots didn’t match when it arrived here. *pout* So rather than trying to over-dye it to match. I decided to go hunting again and see if other Thai silk merchant (the one from Singapore that sends fun little nic-nacs in their package) still had some more of what they call “Plunket Blue” and behold they did – bonus, the dye lots match. Thus, I’m switching my primary colors and making the deep blue-green to the gown and the lime (or “Gooseturd” to be period-proper) petticoate. Oh yeah, I found some lace for my camica too. Here’s a scan of the fabrics.
I’m also still trying to figure out how to use my scanner and the “special HP photo tools” that came with my new PC so the scans are kinda crappy . . . sorry.
All things work together . . . (cira. 8/3/2004) My silk arrived from Singapore on Saturday. The second piece of the lime green is more celery, and it have to be dyed down a tad, and the turquoise is considerably darker than the photo, much teal, sorta that rich deep Aegean sea blue-green. It’s by far less stark and “contrasty” than the Turquoise would have been. It should make wonderful guards, but now what do I use for my corded petticoate? [Can you tell I’ve been watching Buffy The Vampire Slayer on DVD, again?]
Since I was ironing, I had to take the lime silk out, iron it out, and drape it on the chick. This fabric is very lightweight and almost sheer, so I will have to underline the whole thing. I’m thinking bleached muslin because I want to keep the outfit on a whole very light but still have enough opaqueness that whatever color petticoat I end up with doesn’t distort the lime, which is less neon with the new teal trim.
Yipes, that’s loud! (circa. 7/30/2004) I’m an impatient person occasionally when it comes to wanting to jump in and start a new project, especially this one, as I’ve had the trim for nearly 20 years. In lieu of starting the gown, I’m waiting for my petticoat fabric and another piece of the lime silk to arrive, I whipped out my copy of POF and made a photocopy of the dress. Then I carefully matched the silk to my Prisma color pencil and colored away.
After I regained my vision, I was quite pleased with the initial result. When the turquoise silk arrives, I’m going to do the same thing and color in the guards. Back in the day, I once made an orange, yellow, and mustard oversized Hawaiian print (on a white background) “Jackie O” style outfit and wore it after hours at the fair site. (It was a final exam project for FIDM. The garment design was, the fabric was my own twisted sense of fashion sensibility.) The boys from Queen’s Guard threatened to call HazMat on me – it was great fun. Ah, those were the days.
I’ve done a little research into Period Venetian colors. Thanks to one of my favorite places in cyberspace and the woman who convinced me that BBW can still wear period attire and look marvelous, Oonagh’s Own. Her article on period color got me thinking. While my Lime Green is fairly close to being dead on, the Turquoise has me confused. I can’t think of anything Italian, especially Venice, without thinking of brilliant blues and greens.