It seems that Hollywood has now completely run out of fresh ideas and is, has, or is planning to reboot anything popular in the past, and thus, I have decided to take some inspiration from the folks “down below” and do a 1970s reboot of my own.
So what does this mean in the Foxes’ Costuming universe? I plan on pulling some of my favorite patterns from my archives and remaking these vintage gems using modern fabrics that my meager allowance could not afford and then applying my current sewing skills and techniques that my 12- and 15-year-old self did not have.
We will also explore the beginnings of my Capsule Wardrobe obsession that started with Seventeen magazine’s August 1978 “Back to School” issue.
This will be a slow process (as there will be knitting and possibly crocheting involved), and I’m toying with the idea of making videos along with the blog posts, but that is yet to be seen as I’m really quite camera-shy.
PS: These finished items will ultimately be available for purchase and will be Missy sizes 12-14, as those are what sizes the patterns are.
Sometime back, I had the notion of making myself a “one-hour” dress for a tea, which I nerve ended up attending for reasons I will never discuss, but I still made the dress with the crazy notion that I’d wear it to Costume College. But then everything got put on hold due to “the virus,” and the dress has sat in my closet for a year and a half, and I never answered the question as to if it was genuinely possible to make the “One-Hour” dress in an hour.
I believe that it may be possible given idea circumstances such as choice of patterns (there are several versions of the “one-hour” dress), fabric, trim (or lack thereof), and what size dress you are making. However, in specific, the case of my dress, no. If memory serves, it took me about three and a half hours, primarily due partly to the very narrow satin bias binding I used on the neckline. It adds lovely detail to the dress that I wouldn’t change, but it was time-consuming. This three-hour-plus construction time seems to be what most fellow costumers find it’s taking to make the dress.
I have plans to make the dress again in medium-weight linen in a period-appropriate pastel, but not immediately, as I have the 1940s calling, and I need to embrace my inner Peggy Carter and Claire Fraser.
We’ve all seen the references to a mid-1920s dress that can be made in an hour and find ourselves intrigued by the possibilities.
If you are like me, you discovered the “Miss Fisher Mysteries” on Netflix and have become enamored with this non-formula detective drama with a strong female lead. Not only does the show feature the brilliant, smexy as all get-up, burgeoning middle-aged Miss Phyrine Fisher and a delightful group of supporting cast, but some very wearable 1920s clothes.
So now inspired by yet another television drama with fabulous clothes, the siren song of lady google-lay beckons us to comb the web for resources so we can create our own copies of her period-appropriate “Capsule Wardrobe.” [At some point in time, I’ll blog on my love-hate relationship with capsule wardrobes.]
So… sometime back in March, I had a Tea coming up. It was at one of my favorite places, which is housed in a building that was built in 1926. And rather than wear my sad Titanic era dress and the abomination that is the hat, I decided that I would accept the challenge and attempt to make the infamous “One-House” dress and see if it can actually be done in an hour.
I raided my stash and came across some fabric that reminded me of Miss Fisher’s companion, Dorothy (“Dot”) Williams. It’s been washed and ironed. I acquired a pattern, printed it, and read through it, measurements were taken. And as soon as I can get to my sewing room the clock will start ticking.
When you start a new project, you always want to start with a review of the foundational pieces: corset, petticoats, and chemises, and then you ask yourself the following questions:
What do I need?
Do I have something from a different era that will suffice or are the shaped so radically different that I need to make a standalone piece?
Do I really, really need to make another [fill in the blank].
In this particular case, since I’m going to be working my way through the entire book, the answer is in the form of a question, “What is the first project?” In this case, it’s easy-peasy: it’s the first project in the book: “Basic Under-Petticoat.”
Step 1: Find myself some heavy linen.
I have some 7 oz. Spruce green, heavy-weight linen. I’ve been planning on making some Outlander cosplay entirely out of linen, and this seems like a good place to start. I have bleached linen, but it’s only 5.3 oz. Linen and thus, not heavy enough for this project.
Step 2: Measure from my natural waist to lower calf.
I got 33 inches.
Step 3: Cut two pieces 33 inches long by the width of the fabric.
Check; trim fabric width down to 50 inches from 60 inches, for a finished skirt width of about 98 inches, check.
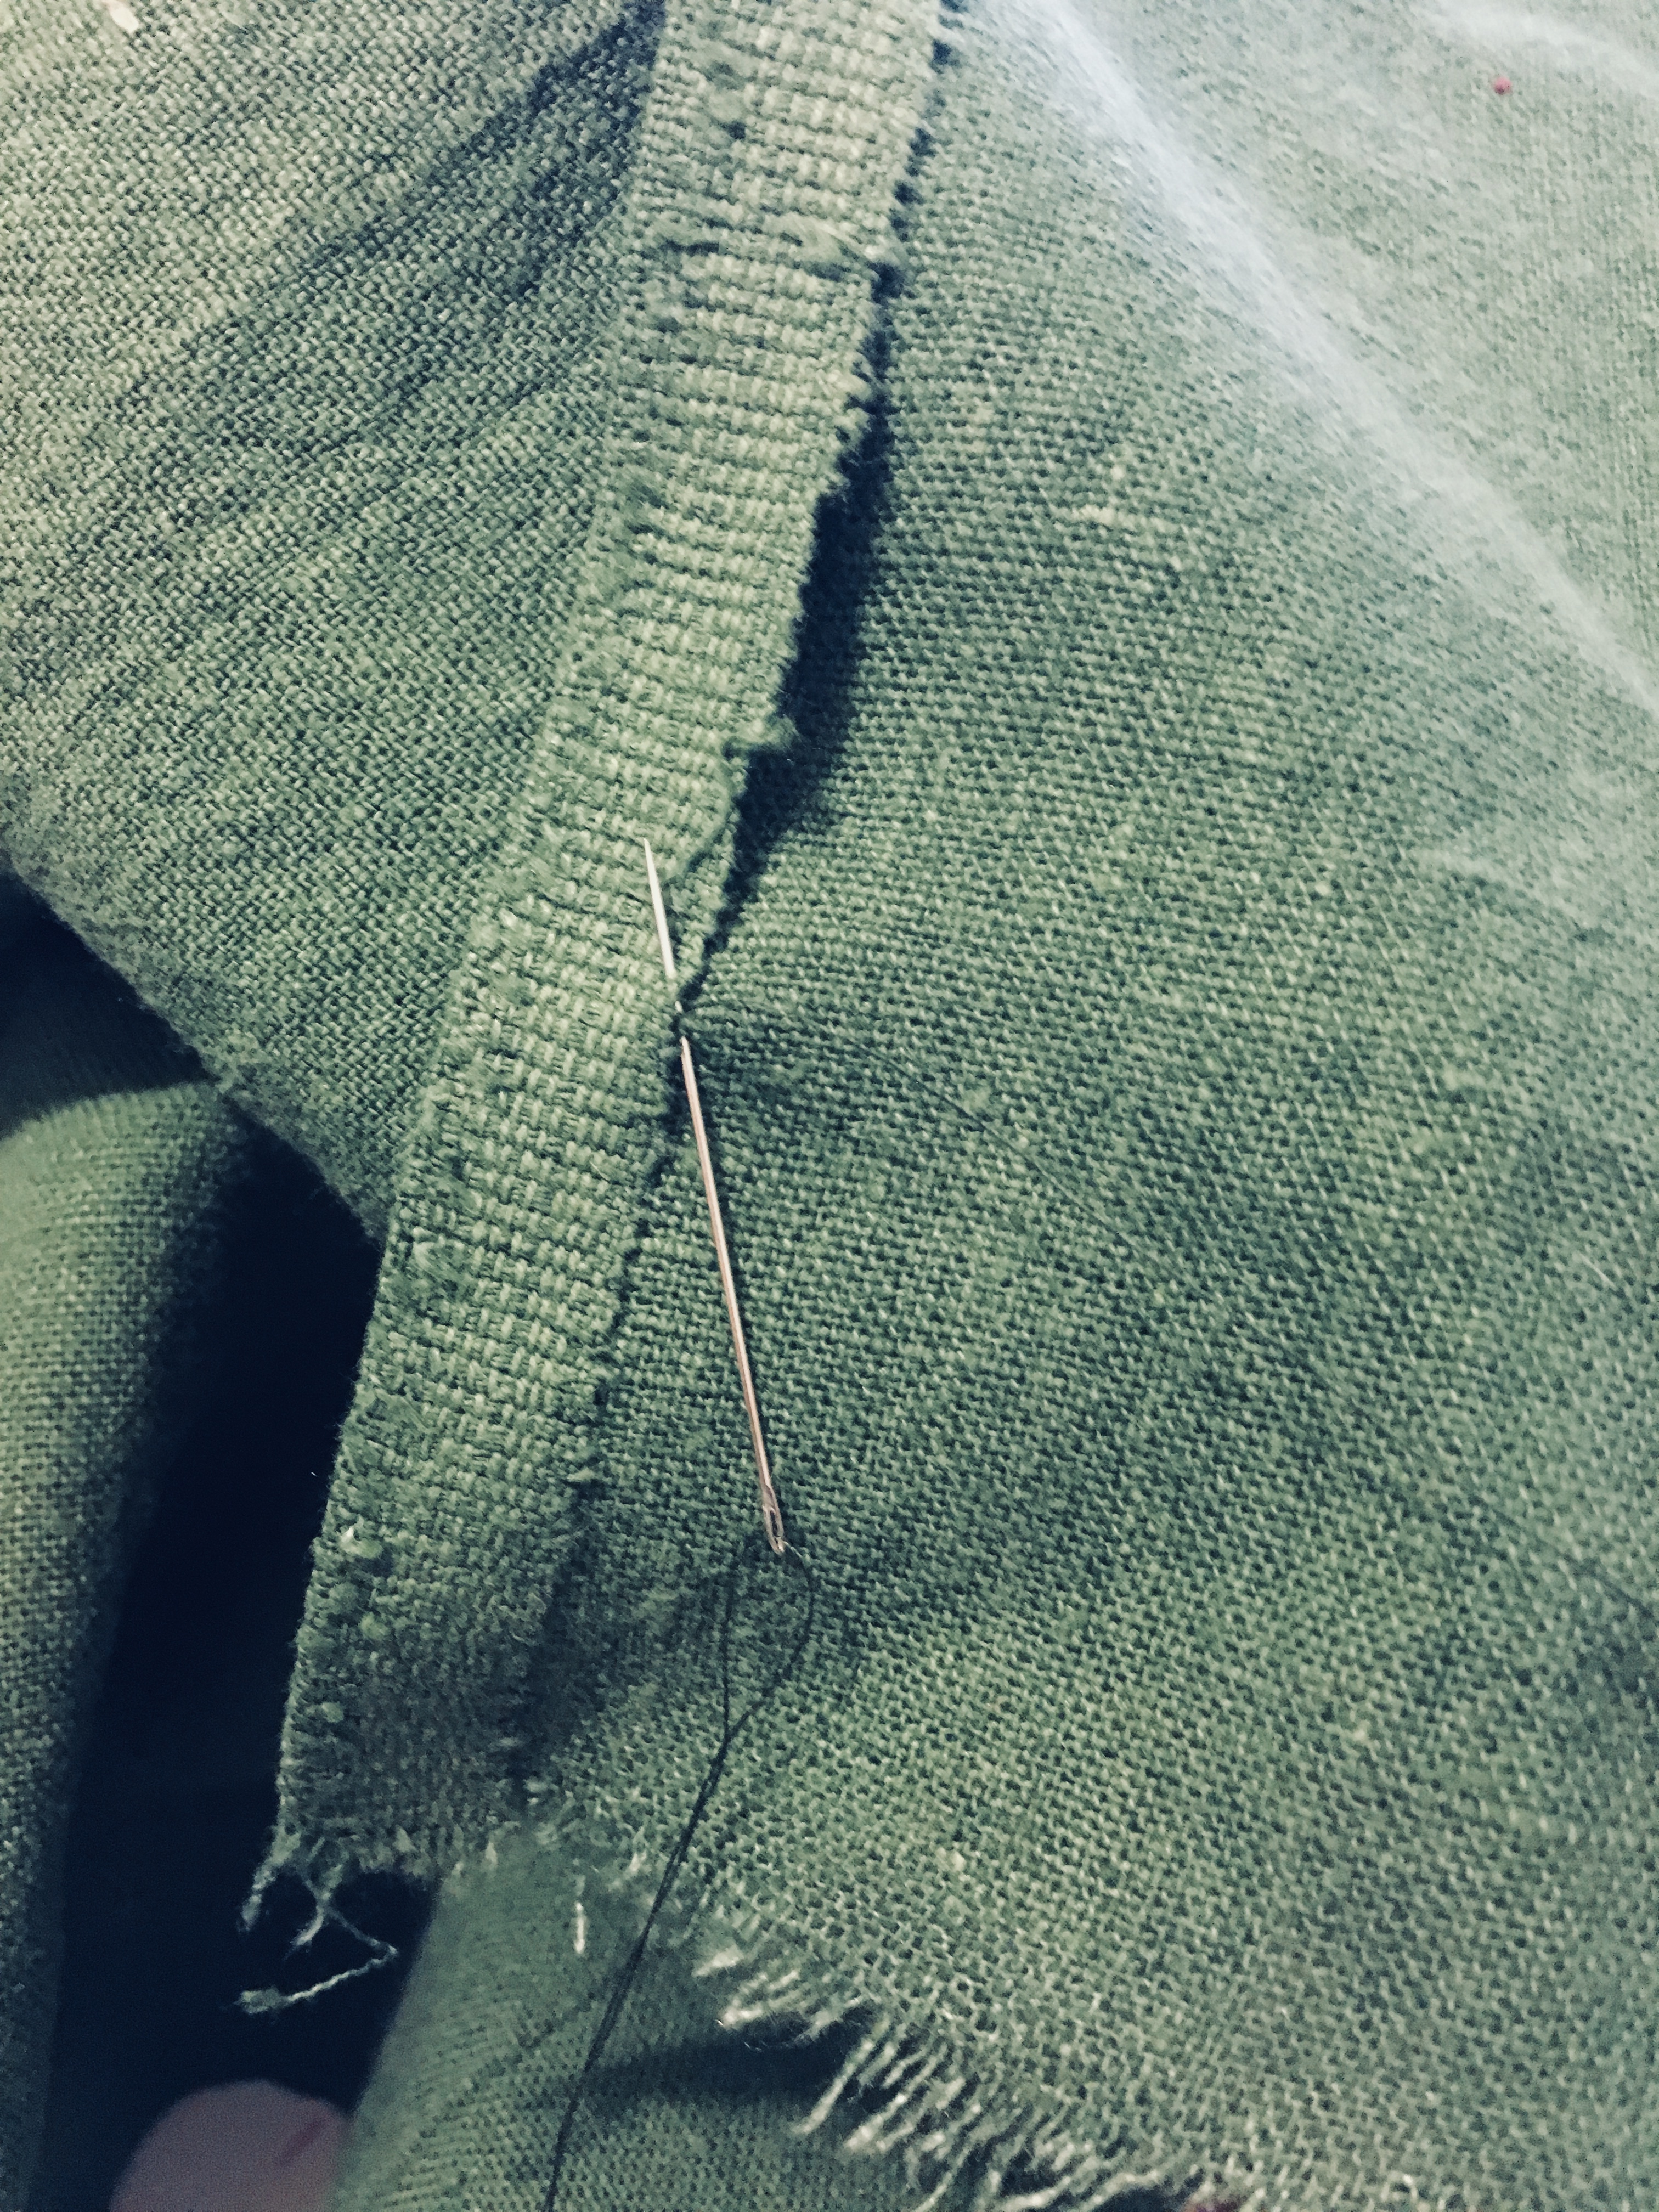
I’m using the mantua maker’s seam on the raw edges of one of the side seams and the other I’ve used the selvage.
Step 5: err …take pictures while sewing
Initial stitching — my hand sewing skills are a bit rusty.
I’ve played a little bit with the color temperature of my iPhone photo in a vain attempt in try and get something closer to the actual fabric. Alas, it’s a fail. And yes, since this is an exercise in using what I’ve got on hand, the thread is a bit too green for the fabric.
You’ve probably noticed that the edges of the fabric are offset. This was purposefully done. I used the mantua maker’s seam to finish the cut edge side seam. The seam finish is very similar to a traditional flat feld seam. The book explains it better than I can. I will add that requires a lot of pins to neatly hold the fabric in place while you’re sewing. I like the look of the finished seam as it is very small and very flat. I plan on using it for my chemises and smocks moving forward as it should make the armscye gussets less bulky and thus, much more comfortable.
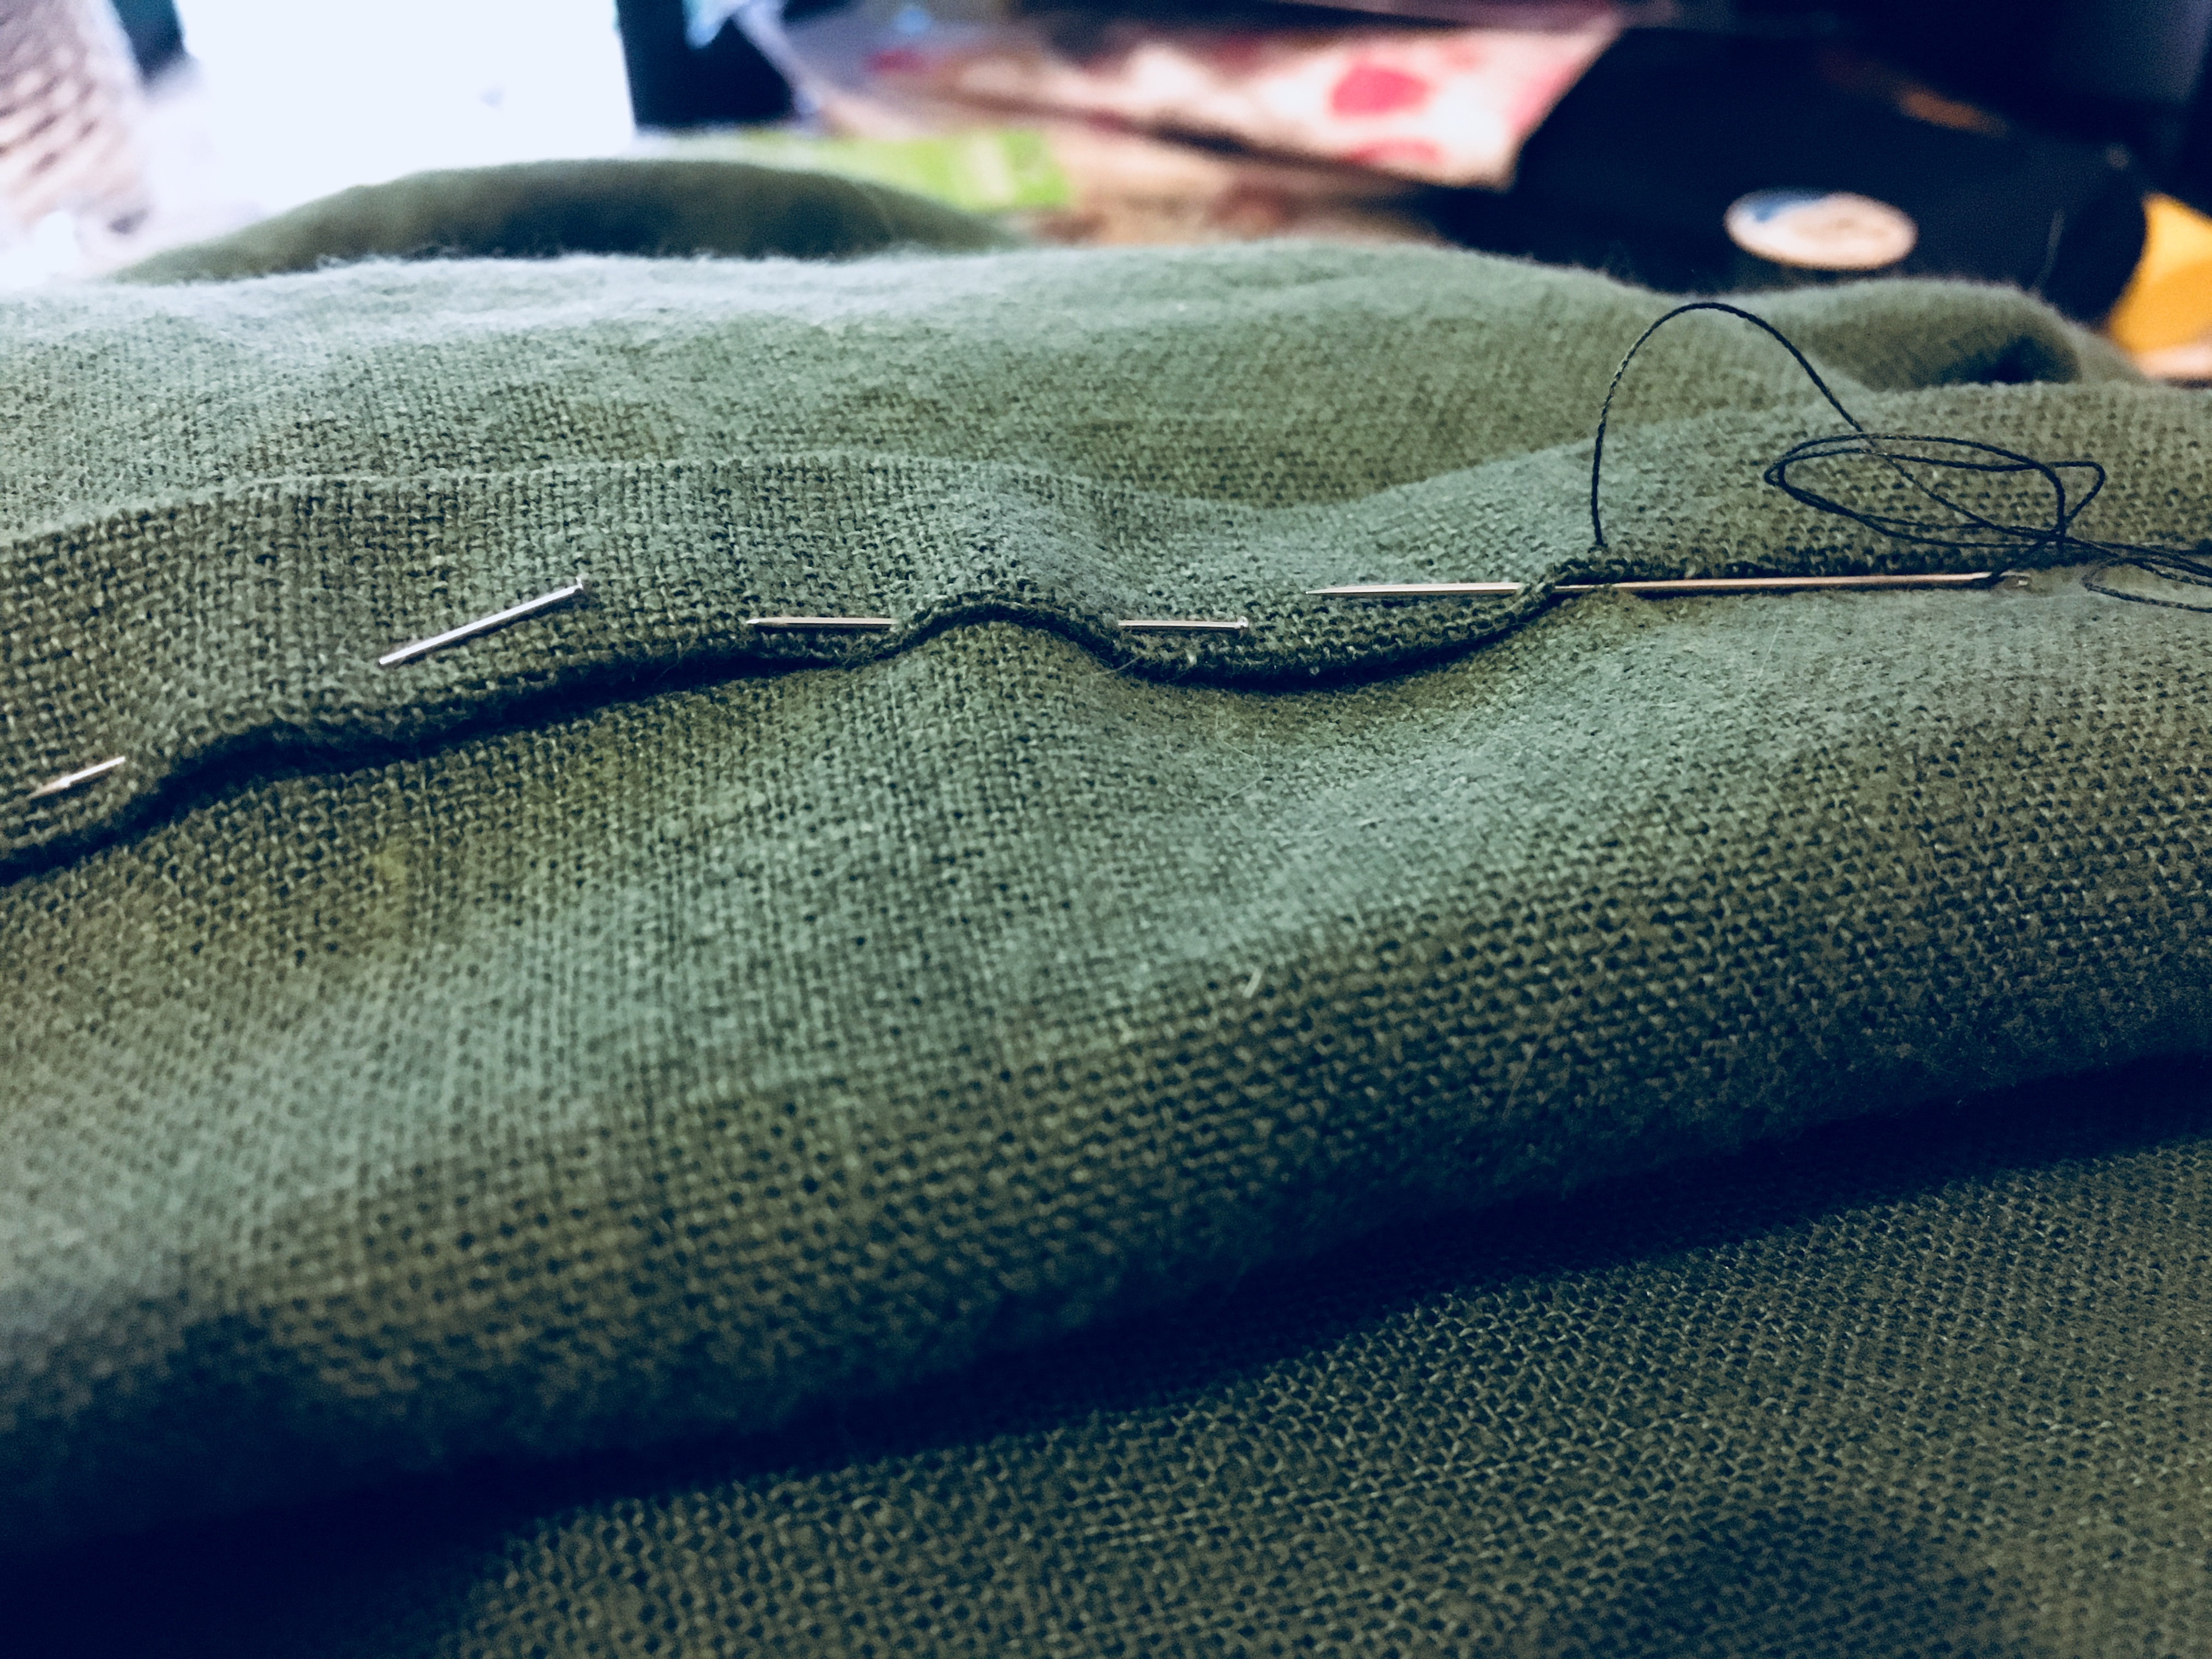
Tacking down the selvage to form the side opening. My stitching is looking a bit better.
I switched to a black silk thread on my other side seam. It’s a little easier to use a single strand, and not doubled. I tried doubled thread, but it kept twisting up on itself and annoying me.
Stitching the double-turned 1/2 inch-ish hem. I eyeballed it and then pinned it to death, stabbing myself a few times in the process.
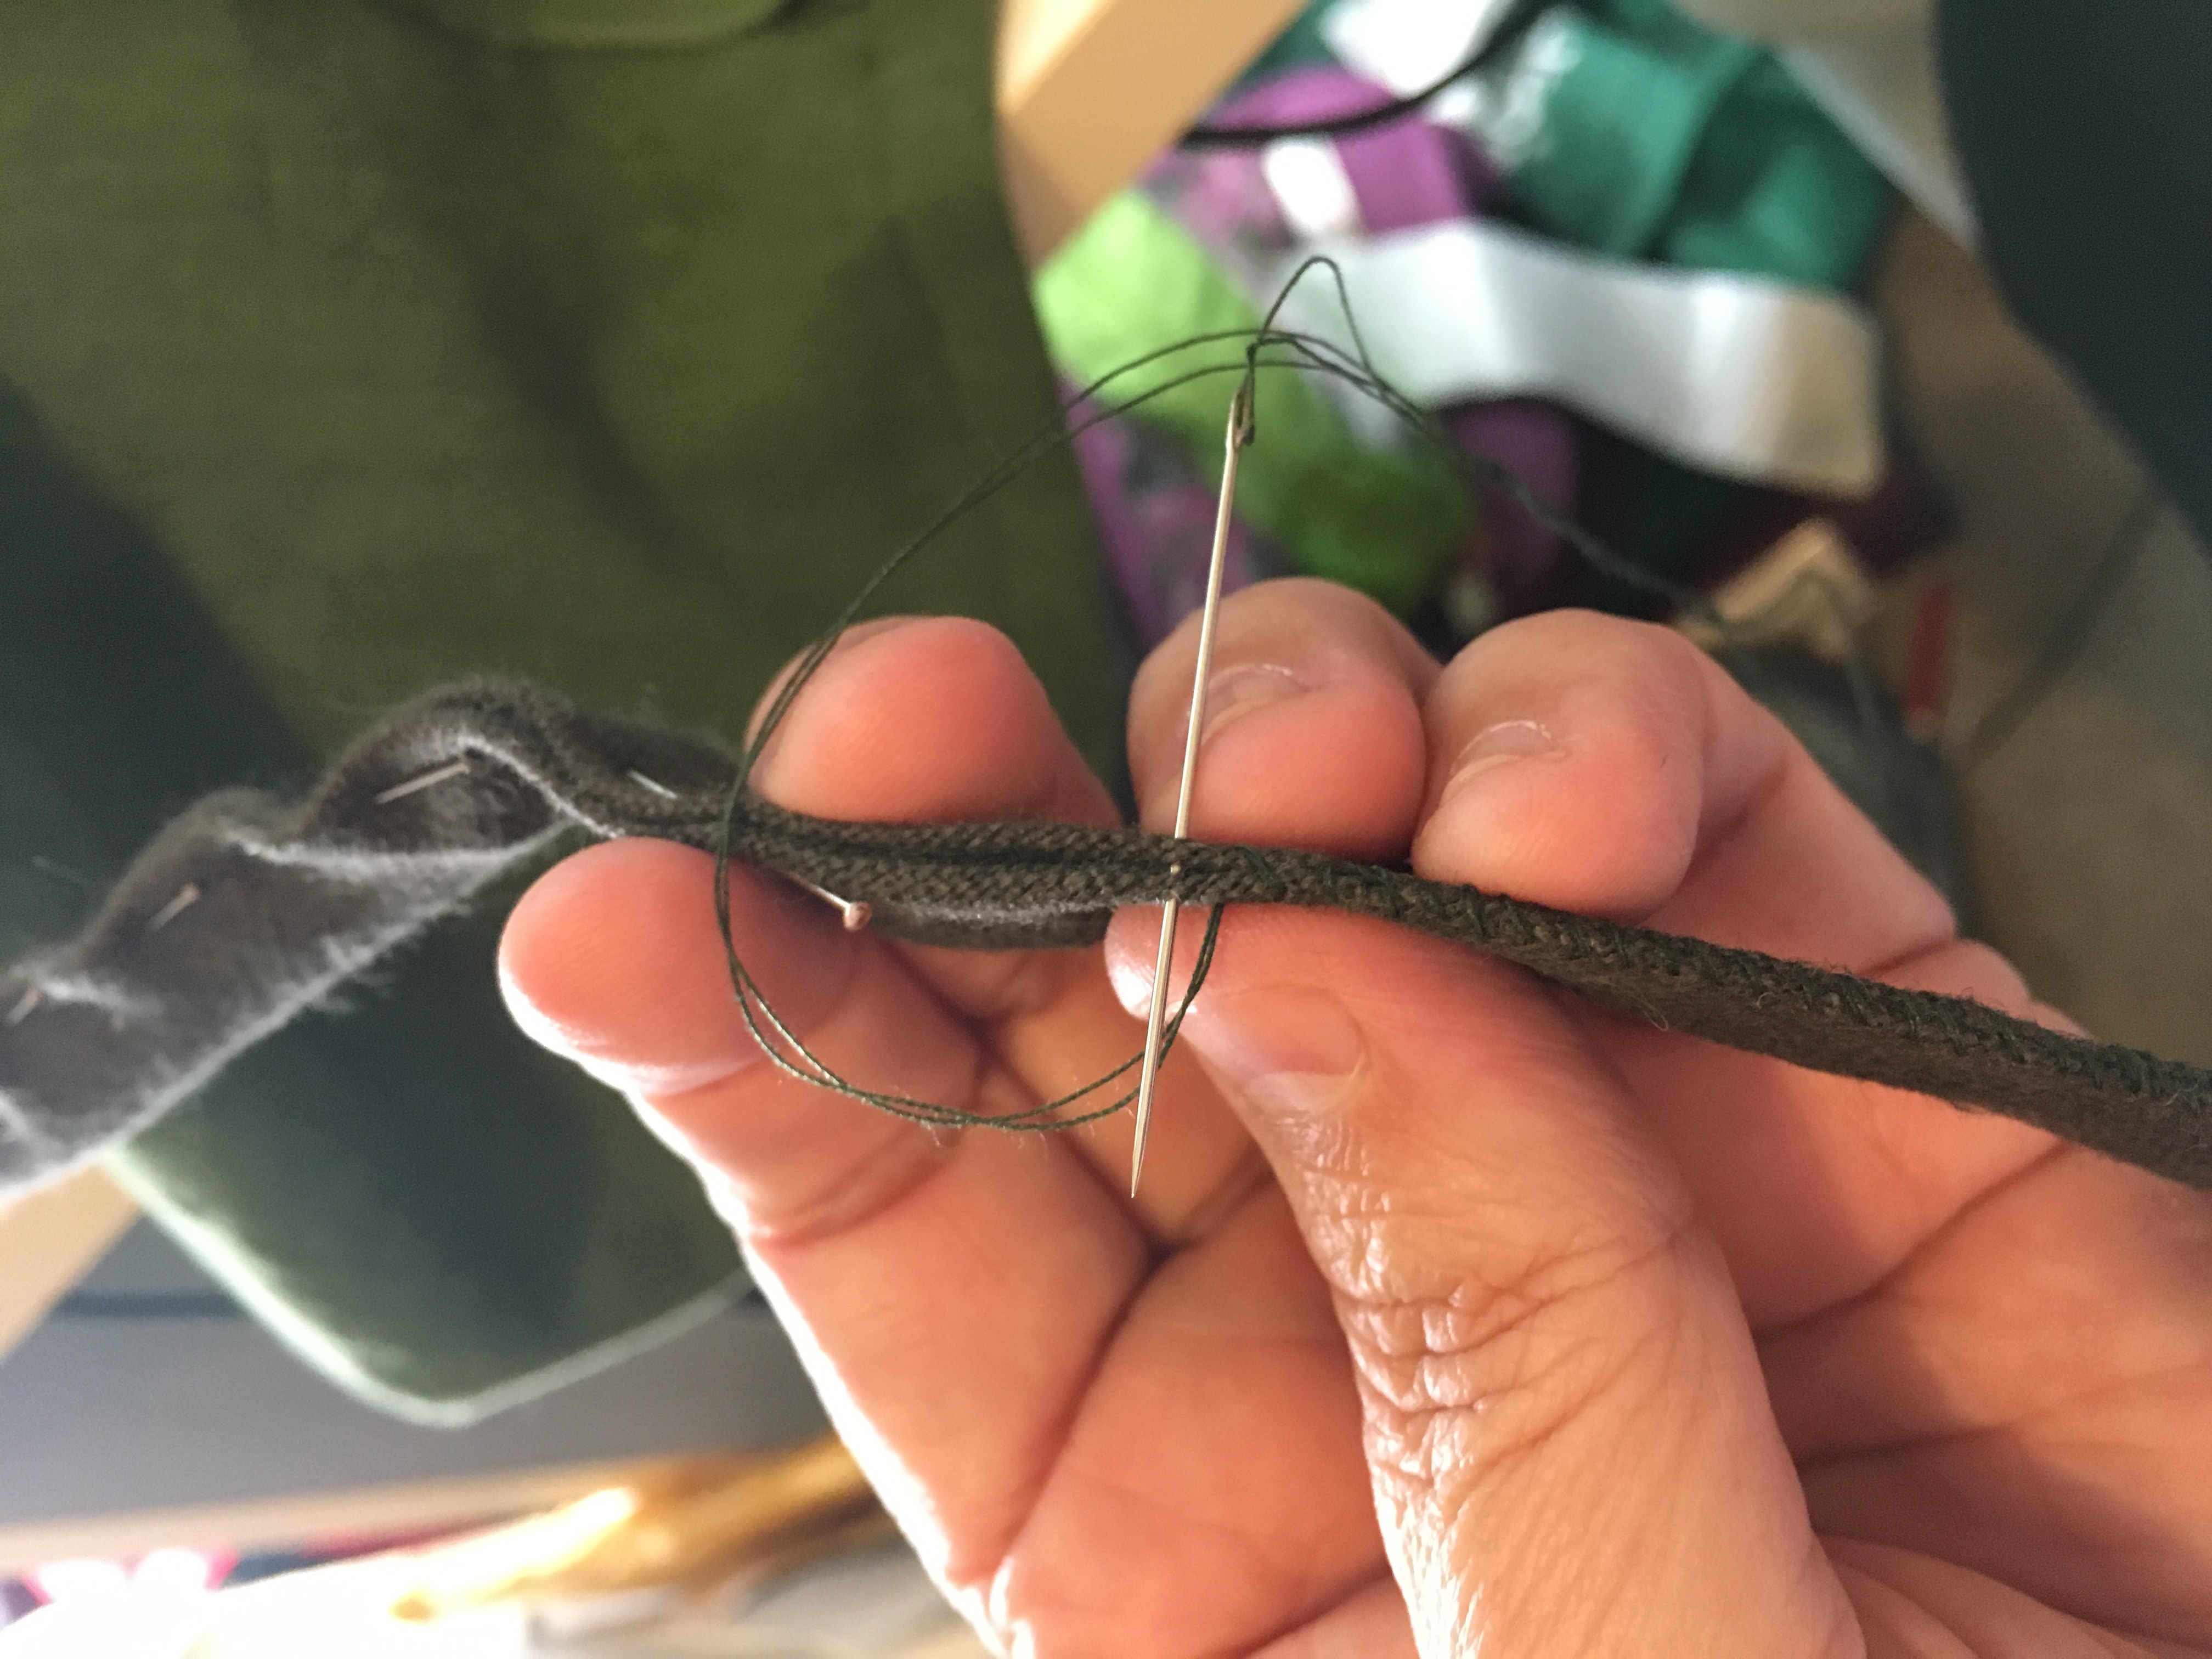
Adding bias tape to serve as the waistband with lots and lots of straight pins to hold it and the pleats underneath in place.
The book calls for 3/4 to 1 ” wide linen or cotton tape for the waistband. As I did not have any, only some 1/2 ” wide twill tape left over from my last Trunk Club, and I already had other plans for it, so I used the linen bias tape I made for the 18th-century cloak class I took at Costume College 2016. [It’s the same fabric that I’m going to be using for my English gown. This way if the skirts slip, it won’t be quite as noticeable.]
Finishing the waistband, and using lots and lots of pins to keep the fabric in place while stitching.
Whipstitching the ties closed with a zillion little stitches.
Step 6: Model finished project.
Petticoat as modeled by “the chick.”
As I totally stuck at selfies of any kind and my husband was out running errands to prepare of a business trip, I popped my new finished onto my dress form that we nicknamed “the chick” many moons ago. It’s currently padded out to fit my BFF, so it’s smaller than my measurements, hence the droopy waistband. That extra green fabric that hanging below is a cotton blanket that is being used to pad the chick out and impatient me didn’t bother to pin up out of the way.
Step 7: Conclusion and nitpicks.
Somewhere in my bio, I believe that it states that my mother taught me how to sew as an attempt to teach me patience, and probably what the results of perseverance will bring forth when you chose to apply yourself. When it comes to sewing, I am a speedy girl. It’s one of the reasons why I own a 1/2 horse-power industrial straight machine. I just want to “getter done.” What I am going to suggest to everyone, regardless of the years of sewing under their belt, is slow down and take the time to read the instructions before launching off into the deep end. I completely glazed over the instructions for cutting the fabric and it wasn’t making any sense until I went back and reread the cutting instructions.
All and all, this is a very easy and straightforward project. The instructions are well written, and for the visual group, the photos are worth a thousand words. Once you’ve mastered this project, you’re ready to tackle the next project: the English Gown Petticoat.
There are days when I question my sanity, and then I remember that I’m running a fever and everything makes sense. I started coming down with a cold when I made this earth-shattering decision: I decided that I was going to make everything in the newly published “The American Duchess Guide to 18th Century Dressmaking” book. Some of it will be done all by hand, some it will be mostly done by machine and other concessions along the way, but all of it will be for me.
The book is nicely presented with color photos and illustrations. The text is easily understood. My only initial complaint is the book does not contain shifts, chemises (if you’re French), or stays (corsets). I’ve watched the YouTube videos and heard about the time constraints and that some things had to be cut, and would be covered elsewhere like the AD blog, but how about a book on underpinnings, and just underpinnings?
For the purpose of continuity and ease for searching, the blog posts, this series is going to be referred to as ADBP with the project name. I’ll be using the Twitter hashtag #HandsewingInsanityProject
I think that I have lost count of how many times I have gotten so frustrated with this project because of miscounting stitches or inadvertently added them that I’ve been left with the only thing to do is rip out everything and start over from the beginning. I think that this makes reboot number 9.
Wanting to truly wipe the slate clean, I started over with not only two different skeins of your, but a new set of knitting needles to wipe any bad psychic vibes that may have been imprinted on the bamboo ones that I have been using. The new ones are part of a multi-size interchangeable set from a company called Knit Picks. The needles are made from multi-layer dyed rosewood. They’re very attractive in a quirky sort of way. I like them.
As part of my personal continuing education and need to keep my brain alive by learning new tricks, I’ve taken up knitting, and not just any knitting, hand-knitting lace. Because I don’t have enough things to drive my insane. Anyways, my neurologist signed off on the idea as being a good one and gave me her blessing to proceed. And ultimate truth be told, I fell in love with all the knitty bits that Claire wore on Outlander and had to have them …and the only way to get them was knit them myself. Fortunately, Lion Brand carries the official Outlander kits.
As my current skill level is slightly better than a novice, there is a whole lot that I simply do not know, thus making any project that’s beyond knitting the 4th doctor’s scarf is new and has a steep learning curve. I’ve ripped it out at least 5 times now because it’s such a simple pattern, it’s easy to get confused.
My chosen project is a Lady’s Wrap circa 1961. It’s to go with my lavender silk cocktail dress for the Friday evening cocktail party. According to the lady from whom I acquired it from on Etsy: “This pattern is from Bear Brand and Fleisher Yarns Hand Knit Mohair Fashions Vol. 55, from 1961….” I invite you to check out her Etsy shop: Vintage Knit Crochet. There are lots of good things to recreate there.
The yarn in question is Patons Lace yarn and the color I’m using what they call “Plum Smoke.” I got it at Joann’s, on sale, before I even knew what I wanted to make because I loved the soft heathery deep lavender color. So when I decided what I was planning on making clothing wise, a wrap for a sleeveless lavender silk cocktail dress seemed natural.
I decided to take a break and write up a little something on this project before I go bonkers and rip it out yet another time.
One of the advantages of going to Costume College is getting to learn what the next year’s theme is going to be, and thus getting a metaphorical leg up on your fellow costumers — not that there are any prizes to won outside of bragging rights and exposure. But it’s nice to be able to dress the party and not be rushed, which I’m going to be anyway because I’m on a D-I-E-T and planning on losing a half a dozen or more dress sizes between now and then …and I am so not going to make everything in a size 28-30 when I could very well be a size 18 by then, just saying.
The theme for next year is the 1960s, which is actually rather great as far as I’m considered. Besides being a child of the ’60s, I am finding myself actually preferring the clothing convention of those two decades: conservative clothes with clean lines and ended with a little funky. Basically, me in fashion. So I decided I would make clothing that I could rotate into my normal day-to-day wardrobe like dresses, skirts, sweaters, pants, jackets and cute little blouses. So I started trolling the interwebs for vintage patterns — those iconic styles from my childhood that we saw so exquisitely reproduced on Mad Men and lovingly watched reruns of Bewitched — but since they are going to be incorporated into my capsule wardrobe, I’ve got to really like them.
I have now acquired about a dozen or two patterns now and each delightful acquisition, with the exception of two, when shown to my (semi-retired) MOD revivalist hubby what meant with “No, that’s too high fashion.” You can well imagine the conversation that has followed….
Me: What do you think of these?
Him: They’re too high fashion.
Me: Did I at any time say that I was specifically doing MOD? No. I said I was doing the ’60s. And for that matter, I don’t think I was specific about what century either. I could very well be doing 1560s, [insert dramatic pause] which gives me an idea…
I also made a list of the number of outfits I am going to need for the three-day event. There’s the Thursday evening Welcome pool party reception, Friday classes, Friday evening cocktail party, Saturday Classes, Saturday night Gala and possibly Sunday breakfast, but only if it looks like I can jet out of Woodland Hills in time for church in Glendale.
Thursday Evening: I’m thinking something hippie chick. I’ve got some truly obnoxious green and blue paisley that will make a wicked swimsuit. Or possibly the pink and orangish swirl for a skirt and some type of floaty peasant type shirt.
Friday Classes: I’m leaning towards something sporty so I can move around. I have some blue and gray paisley reproduction print from Liberty of London that I’ll be using for the shirt. Haven’t decided if I’m going with sleeves or not.
Friday evening cocktail party: This is the one outfit I’ve got locked down. I have lavender silk crepe di chine that I am going to hand-smock the yoke and bead. (Think something that you would expect Samantha Stevens would wear to a corporate cocktail party hosted by the Tates.) And I’m knitting a mohair wrap to go with it. Said wrap is already in production.
Saturday Classes: Again, like Friday classes, I’m leaning towards something sporty so I can move around. To appease the gods of MOD-dom, I’ve decided to go a bit more MOD. I’ll be hand-knitting a sweater. It’s cute: it has a bow. I just need to decide what to pair with it: a skirt or the 1960’s equivalent of skinny jeans…. and research appropriate colors.
Saturday Gala: Because it’s my first love and truly my field of expertise, I’m going 16th century. I haven’t decided with I’m going Tudor or Elizabethan or Venetian, but definitely 16th century.
Sunday morning: something that I can wear to church. However, as I’m typing this blog post up, I’ve decided. I scored some borderline hideous, reproduction blue-green and bone floral print cotton from Liberty of London and a semi-current Simplicity Patterns 1960s dress pattern release that I’m going to whip up.
Costume College 2017 won’t be until the end of July or the first part of August next year so I’ve got six to nine months to change my mind. Let’s see if I do. [Okay, make that let’s see how much I change my mind.] Blog posts to follow as each item progresses.
I’ve always wanted to go to a Dickens Festival and could never make it up to San Francisco to work let alone visit the annual event that is still put on by the same folks behind the original Renaissance Pleasure Faire. I do not even remember how I found it — I may have been searching Steam Punk — but I found one that in held in Riverside, CA and in February. Since it was only just a weekend event, I thought I might be able to get pastoral dispensation and work it, so I volunteered. Then, I realized that I literally did not have a thing to wear, except for a pair of brown tights.
Here is my list:
My patterns are split between two companies: Past Patterns, whose patterns I’ve worked with before and will need to grade up a couple of sizes, and Laughing Moon Mercantile for the first time. Their patterns go up to size 34, which is larger than I actually need.
Chemise: Past Patterns: # 717 — Tucked Chemise, circa 1850-1860, purchased via amazon.com. I found some really awesome paisley eyelet fabric for the body at joann.com and some interesting eyelet trim from Korea on etsy.com. The fabric washed up beautifully and is both delightfully semi-sheer and soft.
Petticoat and Drawers: Past Patterns: # 706 — Mid-19th Century Petticoat & Drawers, circa 1860-1870, purchased via amazon.com. I found some very reasonably priced border eyelet fabric on fabric.com in white for both and denim blue for the top petticoat.
Corset: Bijoux Pattern Co. (they’re a division of Laughing Moon Mercantile) Ladies’ Victorian Corset #1. I picked this one because it’s got more seams and should be easier to make the necessary sizing adjustments. I’m also going to make this in a light khaki-color 5.3 oz linen that I have in my stash.
Day Dress (wrapper style): Laughing Moon Mercantile 120# — Pleated Wrapper/ Word Dress. I found a cream background reproduction print for it at twobeesfabric.com
I also have a ballgown pattern and hoops and bustle pattern, but since I won’t be going to the ball, I won’t be making them for this go-round.
Having run my into the proverbial writer’s block known as having your characters sit down for supper and get stuck there for a year and a half, I decided what better way to get the mojo working again. as I mentioned in my pattern review post, I had run myself out of original Renn Faire character story arc and the proverbial wall. So I decided, “Hey why not make yourself a costume and go to some local faire and be your female protagonist again and see where she takes go.”
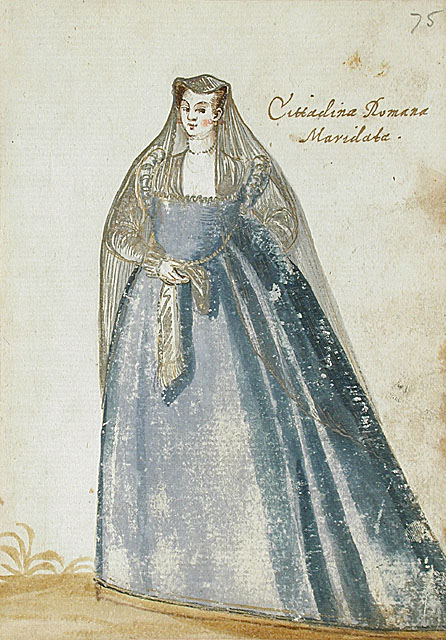
So about a month ago I tweeted out the picture below saying, I’m thinking about making this to wear to the Nottingham Festival, which they favorited and replied they’d liked to see it. My source is taken from the Album Amicorum of a German Soldier that is housed at LACMA. It was part of their online collection a few years back, but is currently unavailable. In looking at my graphics, I found similar gown in “gray” that might fit the bill, too.
I have less than a month to build something from the ground up. And by the ground up, I mean the gown, some type of head covering since I have barely shoulder-length hair, partlet, and a farthingale or petticoat, though I leaning towards just lining the gown with some heavy-weight linen and see where it take me. The only things I don’t need are a smock and a corset.